
- Technical information - what I have learned about pond management through trial-and-error.
Home
The Garden
Development
Inspiration
Contact
Technical Information:
-
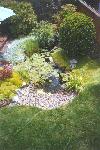
 Pond placement and setting:
The is located in Corvallis, Oregon near the Coast Range and roughtly 45 degrees latitude. The climate is cool in the summer and
wet in the winter... ideal for a Japanese Garden.
The pond contains approximately 600 gallons, figure-8 shaped and roughly 2.5 feet deep sloping to 3 feet at the sump end. A standard PVC pond liner material was used. The earth excavated from the pond was used to construct the mound on it's north shore and the slope for the waterfall on it's south-east corner. The pond appears to occupy a slight slope, having a steep bank on the east end and shallow rock "beach" on the west end.
The deck seen in the picture will eventually form the foundation for a Japanese Bath house (Onsen) constructed in timber with shoji screen sliding doors for pirvacy. -- RN
- Raccoons - The only lasting solution.
- Winterizing the pond - Dealing with freezing water.
- Pea Soup - Riding the pond of suspended algae.
- Filimentious Algae - Angel hair it is not.
- Filtration - Overview of the system.
- Veggie Filter - Using plants to remove nutrients.
- Bio-filtration - Trickle-down filtration system.
- Foamy Water - Water testing and chemistry.
- The Lanterns - Constructing the "pagoda" lanterns.
Raccoons:
One can easily tell when raccoons have invaded the pond; missing fish and thrashed water plants. These creatures can cause a lot of damage including tearing the pond liner with their sharp claws. Trapping and releasing is very ineffective as it is usually only possible to trap one individual at a time. I successfully trapped one raccoon by baiting the trap with marshmallows. Trapping can also be dangerous; these are wild animals with sharp teeth and claws. The one I trapped kept trying to attack my hand as I reached toward the handle of the trap to pick it up. I was again extremely aware of the risk of being bitten while opening the trap to release the critter several miles from my home.The following evening, my wife and I watched in amusement as an obviously trap-wise raccoon carefully avoided being caught by reaching through the bars to pull out the tasty marshmallows through the back and sides of the trap..
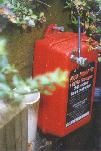

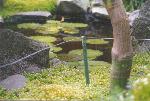 The ultimate solution was to install a small electric fence around the perimeter of the pond. I
obtained the fence transformer from Home Depot. I cut the 4-foot ½ inch diameter fiberglass
electric fence polls into one-foot lengths, sawed a small slot in the top of each of the cut polls to
accommodate the wire, then spray painted the polls green to better blend in with the foliage. The
electric fence is extremely effective, however, proper placement around the pond is crucial or the
wily creatures will exploit any weakness in the defenses. I neglected to place the wire close
enough to the waterfall; there was sufficient gap so that the clever Raccoons discovered they
could crawl down the waterfall, and under the wire, to gain access to the pond. With proper
placement, after experiencing a few zaps, the raccoons will avoid the yard altogether.
Still, the electric wire is visible and can be somewhat unattractive. I usually remove it when I am having a garden party or gathering in the yard (and so I don't zap my guests). It takes only a few minutes to replace the wire.
Winter freezing:
Geographically, my pond is located close to the 45o parallel latitude on the west side of the Oregon Cascades. We are close to the Pacific Ocean so freezing weather is not extreme here but the pond does occasionally freeze for a few weeks during mid-winter. To keep the pond from freezing over I use a "stock tank heater" purchased from the local feed store. The heater contains a heating element which is suspended under a floating ring. It doesn't electrocute the fish and keeps a nice 2 or 3 food diameter hole in the ice during the winter months.Pea Soup water:
I spent several years trying to control the annual spring algae bloom which would turn the water a brilliant tone of chartreuse. I purchased a Beckett UV filter from Home Depot and installed it between the pump and the bio-filter. Within a week, the green water disappeared. In my opinion, a UV filter is well worth the investment. I disconnect the UV during the winter, placing it in constant service through the spring and summer months.Filamentous (Angel Hair) Algae:
The green string algae grows on the side of the pond in the spring. A friend and fishery expert with the Oregon Fish and Wildlife Department told me that the presence of string algae is actually a sign of healthy water. Nevertheless, it seems to break off into clumps and foul the pump. The only effective way I have found of managing string algae is to comb it out with a small plastic rake or by hand. The algae string clumps that do break off and suspend in the pond water is removed mostly be being trapped in my custom-designed pump PRE-Filter.
FILTRATION - Pre-Filter: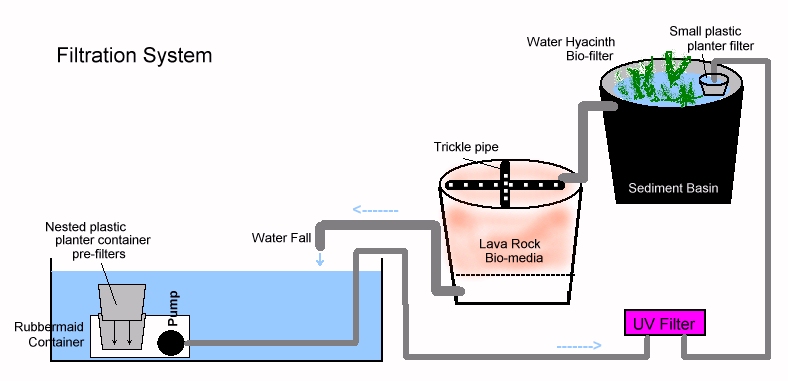
Many pond owners encase their submersible pumps within a screen cage or filter box to prevent the algae and muck from being sucked into, and fouling, the pump. My experience is that this system also becomes clogged requiring that the whole pump and pre-filter be removed and cleaned every few days.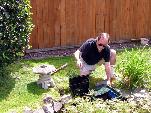 I devised a system where I can lift the pre-filter basket out of the pump pre-filter system
separately, leaving the pump undisturbed on the bottom of the pond. I purchased a rectangular
Rubbermaid container and placed the submersible pump on it's side within the container. The 1"
outlet tubing exits through a hole in the side of the container. On one side of the container's lid, I
cut a square hole that would accommodate a Becket plastic planter. I actually nest two planters
within the hole. All the water sucked to the pump inside the container is drawn through the
plastic planter pre-filters. I attached a loop of wire to the planters so I could easily reach in and
pull the pre-filters out, hose them off with the garden hose, and replace them back into the
container.
Veggie-Filter:
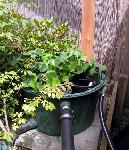
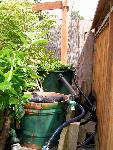 After passing through the UV filter, the pond water empties into a large plastic half-barrel. I used
an actual PVC oak barrel "liner" which many people use for a small oak-barrel pond in itself. The
pond water empties into the plastic barrel liner through another Beckett plastic pre-filter. The
water surface contains floating Water Hyacinth which help take some of the nutrients out of the
water. The barrel also has a stand pipe to prevent disasters should the outflow become blocked
and the pond pumped dry as water overflows the rim of the barrel. The outflow proceeds on into
the Bio-filter.
Bio-filter:
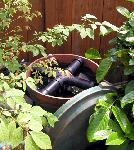
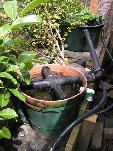 The bio-filter is constructed from a large plastic flower pot. This unique pot was designed for
planting small trees as it contains a permeable plastic separator (a sort of false bottom) roughly 3"
from the bottom of the pot. I fill the pot 2/3 full of lava rock then cover the lava rock with a
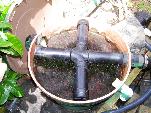
piece of plastic window screen cut to fit the circumference of the pot. Short sections of 2"
plastic pipe set into a 4-way union to form an X. Holes are drilled in the X-pipe to create a
trickle "sprinkler". The water from the Veggie Filter enters this trickle sprinkler, filtering through
the lava rock and into the void in the bottom of the pot created by the permeable separator. From
there, the water flows back into the pond via the waterfall. The Bio-filter also contains a stand
pipe so that when the screen/lava rock become clogged, water can flow back into the pond via the
standpipe rather than overflow over the sides of the bio-filter.
 The bio-filter still can become clogged, but usually simply by removing the plastic window screen,
hosing it off, then replacing it back over the lava rock. About twice a year, the lava rock becomes
sufficiently clogged with much that it needs to be removed from the bio-filter and cleaned. I
dump the lava rock into a large wheelbarrow and rinse it with water from the pond. It is
important that pond water be used and not the garden hose; most city water contains chlorine
which will kill the nitrifying bacteria in the lava rock media. This bacteria is necessary for good
bio filtration and will need to be reintroduced to the bio-filter if it is cleaned with chlorinated
water.
Foamy water:
After experiencing bouts of foamy water around the waterfall, I sprung for a water test kit. The water analysis indicated ordinarily high alkaline on the PH scale. I purchased a product called PH Down from my local pond store. Moving the PH to a more neutral situation reduced the foamy water.Digital photography by A. Ellendman
Lanterns:
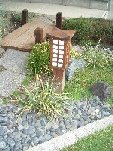
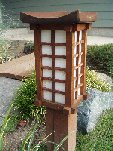
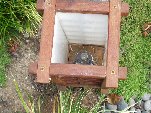 I occasionally get questions regarding the "pagoda" lanterns in the garden. These are handmade
wooden lanterns with white translucent plastic panels. The light source is 4w or 6w Low Voltage lights which
are sold in sets (transformer + 10 outdoor lamps) at garden supply stores; I purchased mine at Home Depot.
I threw away the cheap-looking lamp housings and kept the bulb mounts and transformer. The bulb mount
fits snugly into a 1" PVC pipe end cap. If you secure the PVC end cap into the top of a 4" X 4" post, the cap
becomes a perfect recepticle for the bulb mount. The wooden light fixture then mounts to the top of the 4" X 4".
I used a band saw to fashion the curved "roof" of each lantern. The roof lifts off for easy access to change
burnt-out bulbs. The low voltage lanterns provide a warm glow to the garden at night as well as sufficient
light to illuminate along the paths.